The Japanese Katana is more than just a sword; it is a powerful symbol of culture and history. Crafted using traditional techniques, these swords showcase the skill and dedication of master swordsmiths. Each step, from creating the tamahagane steel to the final polishing, is crucial. This blog will take you through the entire katana-making process, revealing the artistry behind these legendary blades. Discover how ancient methods turn raw materials into sharp, durable katanas that continue to fascinate people around the world.
Understanding Japanese Katana
A Japanese katana is a traditional sword known for its sharpness and strength. It features a curved, slender, single-edged blade with a circular or squared guard and a long grip for two-handed use. Made using traditional methods, the katana combines high-carbon and low-carbon steel to achieve both hardness and flexibility. This sword is not only a weapon but also a symbol of Japanese culture, representing craftsmanship, history, and the samurai spirit.

Step 1: Gathering the Right Materials
The journey of creating a katana begins with gathering the right materials. The most crucial material is tamahagane steel, a type of high-quality steel unique to Japanese sword making.
-
Tamahagane Steel and Its Significance
Tamahagane steel is made from iron sand, known as satetsu. This steel is vital because it combines hardness and flexibility, essential for a katana’s performance. Tamahagane is rich in carbon, which is necessary for producing a sharp, durable edge. The unique properties of tamahagane make it the preferred choice for traditional Japanese swordsmiths.
-
Process of Smelting Iron Sand
The process starts by smelting iron sand in a tatara furnace. This traditional Japanese furnace operates at extremely high temperatures. Craftsmen fill the furnace with layers of iron sand and charcoal. The intense heat causes a chemical reaction, separating the iron from the sand. Over several days, the iron collects at the bottom, forming a mass of tamahagane steel.
The smelting process is critical. It requires constant attention and skill to maintain the right temperature and mixture. This ensures the tamahagane steel is of the highest quality, with the right balance of carbon.
-
Sorting the Steel
After smelting, the steel is broken into pieces. These pieces are then sorted based on their carbon content. High-carbon steel is used for the cutting edge, while low-carbon steel is used for the core. This combination of hard and soft steel gives the katana its strength and sharpness.
Starting with high-quality materials sets the foundation for crafting a superior katana. The careful process of gathering and preparing tamahagane steel highlights the dedication and expertise involved in traditional sword making.

Step 2: Preparing the Steel
Crafting a katana involves careful preparation of the steel. This step ensures the blade will be strong and sharp.
-
Sorting the Tamahagane
First, the tamahagane steel is sorted. After smelting, the steel pieces are broken down. The pieces are separated based on their carbon content. High-carbon steel is used for the blade's edge, making it very sharp. Low-carbon steel is used for the core, giving it flexibility. This sorting is essential for making a balanced blade.
-
Initial Forging and Folding
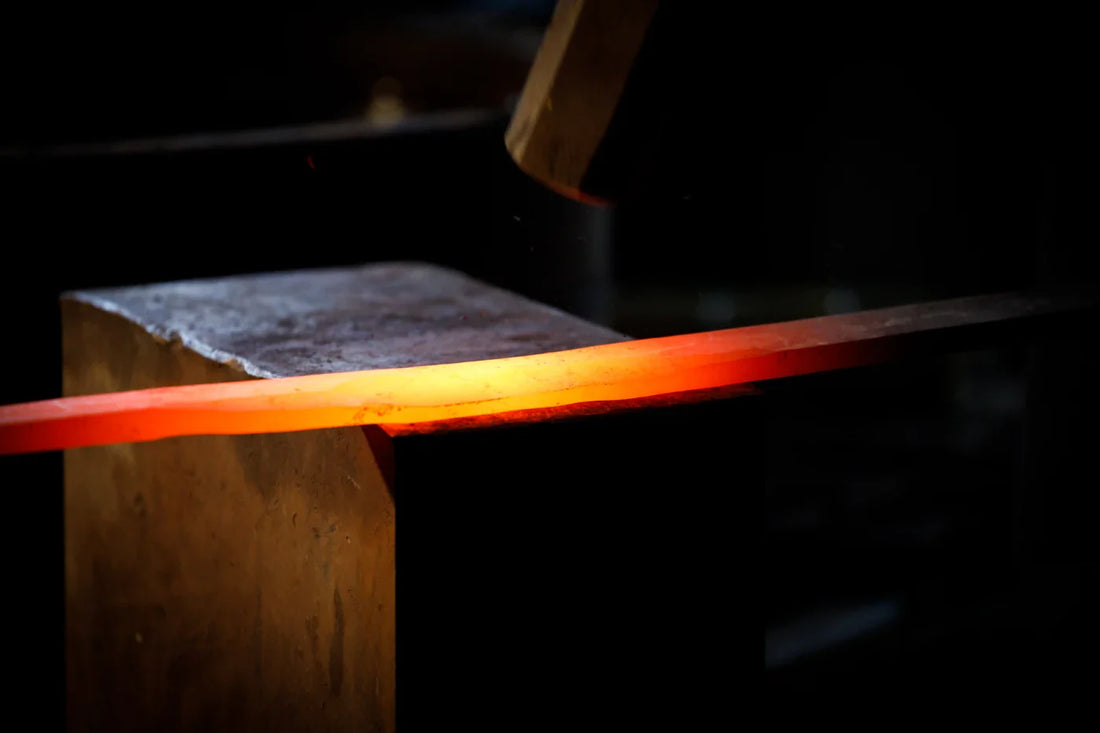
Next, the steel undergoes initial forging. The steel is heated until it is red-hot. Then, it is hammered to form thin layers. These layers are folded over each other many times. Each fold helps to remove impurities. This process, called "forging tamahagane," also spreads the carbon evenly. The repeated heating and folding make the steel stronger and more resilient.
-
Steel Purification
Purifying the steel is crucial. Each fold and hammer strike must be precise. The goal is to remove impurities like slag. By folding the steel, multiple layers are created, making the blade stronger. This process can involve folding the steel up to 16 times. The more folds, the purer the steel, which is important for the katana's performance.
-
Forming the Blade
After purification, the steel is ready to be shaped. The steel is hammered into a bar and reheated several times. This process shapes the steel into a form suitable for the blade. The purified and folded steel is now ready for the next stage: forming the actual katana blade.
Preparing the steel is a vital step in making a high-quality katana. Each step, from sorting to folding, ensures the steel is pure and strong. Understanding this process shows the skill and dedication needed in traditional sword making.

Step 3: Forging the Blade
Forging the Katana blade is a crucial part of making a katana. It involves combining different types of steel to create a strong, sharp sword.
-
Combining High-Carbon and Low-Carbon Steel
The process starts with two types of steel: high-carbon and low-carbon. High-carbon steel forms the outer shell of the blade. This makes the blade sharp and hard. Low-carbon steel is used for the core, giving the blade flexibility. Combining these two types of steel creates a balance between strength and flexibility, which is essential for a katana.
-
Heating, Hammering, and Folding
The steel pieces are heated in a forge until they are red-hot. The hot steel is then hammered flat. After flattening, the steel is folded over itself. This folding process is repeated many times. Each fold helps to remove impurities and evenly distribute the carbon. This makes the steel stronger and more uniform. The repeated heating, hammering, and folding are what give the katana its unique properties.
- Forming the Blade
After multiple rounds of folding, the steel is formed into the shape of a blade. The swordsmith carefully hammers and shapes the steel, ensuring it has the right curvature and thickness. This shaping process is done with great precision to create a perfect blade.
Forging the blade is a detailed and skilled process. It involves combining high-carbon and low-carbon steel, then heating, hammering, and folding the steel multiple times. Each step is crucial for creating a katana that is both strong and flexible. This traditional method of blade forging showcases the expertise and dedication of Japanese swordsmiths. For more information on the forging techniques, see Traditional Katana Forging Techniques explained.

Step 4: Forming the Steel Stock
Forming the steel stock is a vital step in making a katana. This process shapes the steel into a rough blade, called a sunobe.
-
Shaping the Steel into a Sunobe
The steel, now purified and folded, is heated again. The hot steel is then hammered into a long, rectangular bar. This rough shape is known as the sunobe. The sunobe is the basic form of the katana blade. It needs to be precise, as it sets the foundation for the final shape of the blade.
-
Ensuring Proper Layering and Fusion
Creating a strong blade requires proper layering and fusion of the steel. The swordsmith carefully hammers the steel to ensure the layers bond well. This process involves heating the steel repeatedly and hammering it to remove any gaps or weak spots. The goal is to create a solid, uniform piece of steel.
Step 5: Shaping the Blade
Shaping the blade is a critical step in making a katana. This process involves hammering and grinding to achieve the final form. For more on shaping and other related techniques, see How Sharp are Samurai Swords?
-
Hammering the Blade
The sunobe, or rough blade, is heated again. The swordsmith uses a hammer to shape the blade precisely. This involves carefully striking the steel to form the edge and spine. The hammering must be accurate to ensure the blade is strong and properly shaped. This step defines the blade's basic structure.
-
Grinding the Blade
After hammering, the blade undergoes grinding. The swordsmith uses coarse stones to smooth and refine the blade. Grinding removes any irregularities and ensures the blade has a consistent thickness. This step is essential for preparing the blade for its final polish.
-
Achieving the Right Curvature
Creating the right curvature, known as sori, is essential for a katana's effectiveness. This is done by carefully controlling the heat and quenching process, which causes the blade to bend naturally.
Shaping the blade involves detailed hammering and grinding. Achieving the right curvature is vital for the blade's performance. Each step in this process requires skill and precision, showcasing the swordsmith's craftsmanship and dedication.

Step 6: Heat Treatment and Quenching
Heat treatment and quenching are key steps in making a katana. These processes harden the blade and form its distinctive curve.
-
Applying the Clay Mixture
A clay mixture is applied to the blade to create the hamon, or temper line. This mixture covers the spine and sides while leaving the edge exposed, protecting parts of the blade during the heating process. The unique pattern formed by the clay makes each katana distinct.
-
Heating the Blade
The blade is then heated in a forge. It must reach a high temperature, but only the edge gets the most heat. This selective heating is crucial for creating a sharp edge while keeping the spine flexible. The process requires careful control to ensure the blade heats evenly.
-
Quenching the Blade
After heating, the blade is quickly cooled in water. This sudden cooling, or quenching, hardens the edge. The temperature difference between the edge and the spine causes the blade to curve. This curve, called sori, is a characteristic feature of the katana. The quenching process also locks in the blade's hardness, making it durable and sharp.
Heat treatment and quenching are vital for a katana's performance. Applying the clay, heating, and then quenching the blade create a strong, curved edge. This step showcases the precision and skill needed in traditional sword-making.
Step 7: Polishing the Blade
Polishing the blade is a crucial final step. It is done by a skilled artisan known as a togishi.
-
The Process of Polishing
The togishi starts by using rough stones to grind the blade. This removes any imperfections and smooths the surface. The blade is then polished with finer stones, each finer than the last. This step-by-step polishing process reveals the blade's sharpness and shine. The togishi works carefully to ensure the blade has an even, mirror-like finish.
-
Revealing the Blade’s Characteristics
Polishing is not just about making the blade shiny. It also brings out the blade's unique characteristics. The togishi highlights the hamon pattern, which is the temper line created during heat treatment. This pattern is a sign of a well-made katana. It shows the skill and craftsmanship that went into the sword. The togishi also ensures the blade's edge is razor-sharp and ready for use.
Polishing the blade is essential for both its beauty and function. The detailed work of the togishi reveals the blade's true character, including the hamon pattern. This final step showcases the craftsmanship that makes each katana unique and effective.

Step 8: Final Assembly
Final assembly is the last step in making a katana. It involves attaching the hilt and fittings.
Attaching the Hilt (Tsuka) and Fittings
The hilt, known as the tsuka, is attached to the blade. The tsuka is made from wood and wrapped in ray skin and silk or cotton. It is carefully fitted onto the blade's tang. The fittings, including the guard (tsuba) and pommel (kashira), are also added. These fittings are not only decorative but also functional, providing balance and grip.
Ensuring Proper Balance and Alignment
Proper balance and alignment are crucial for the katana's performance. The swordsmith adjusts the fittings to ensure the katana is balanced. This makes the sword easier to handle and more effective in use. The alignment of the blade and hilt must be perfect. This ensures that the katana is strong and durable.
Final assembly is vital for creating a well-balanced katana. Attaching the tsuka and fittings, and ensuring everything is properly aligned, completes the process. This final step highlights the care and precision involved in making a katana.

Discover Authentic Japanese Katanas at Our Store!
Explore our wide selection of genuine Japanese katanas. Each sword is crafted with traditional techniques and expert craftsmanship. Whether you are a collector or an enthusiast, find the perfect katana to suit your needs. Experience the beauty and power of these iconic swords today. Visit our store and discover your authentic katana.
Creating a katana is a careful process that showcases exceptional craftsmanship. Each step, from preparing the steel to the final assembly, requires skill and precision. This traditional sword-making process results in a blade that is both a work of art and a functional weapon. Today, the katana holds significant cultural importance, symbolizing both historical tradition and artistic excellence. The dedication to katana craftsmanship continues to inspire and fascinate people around the world.


